
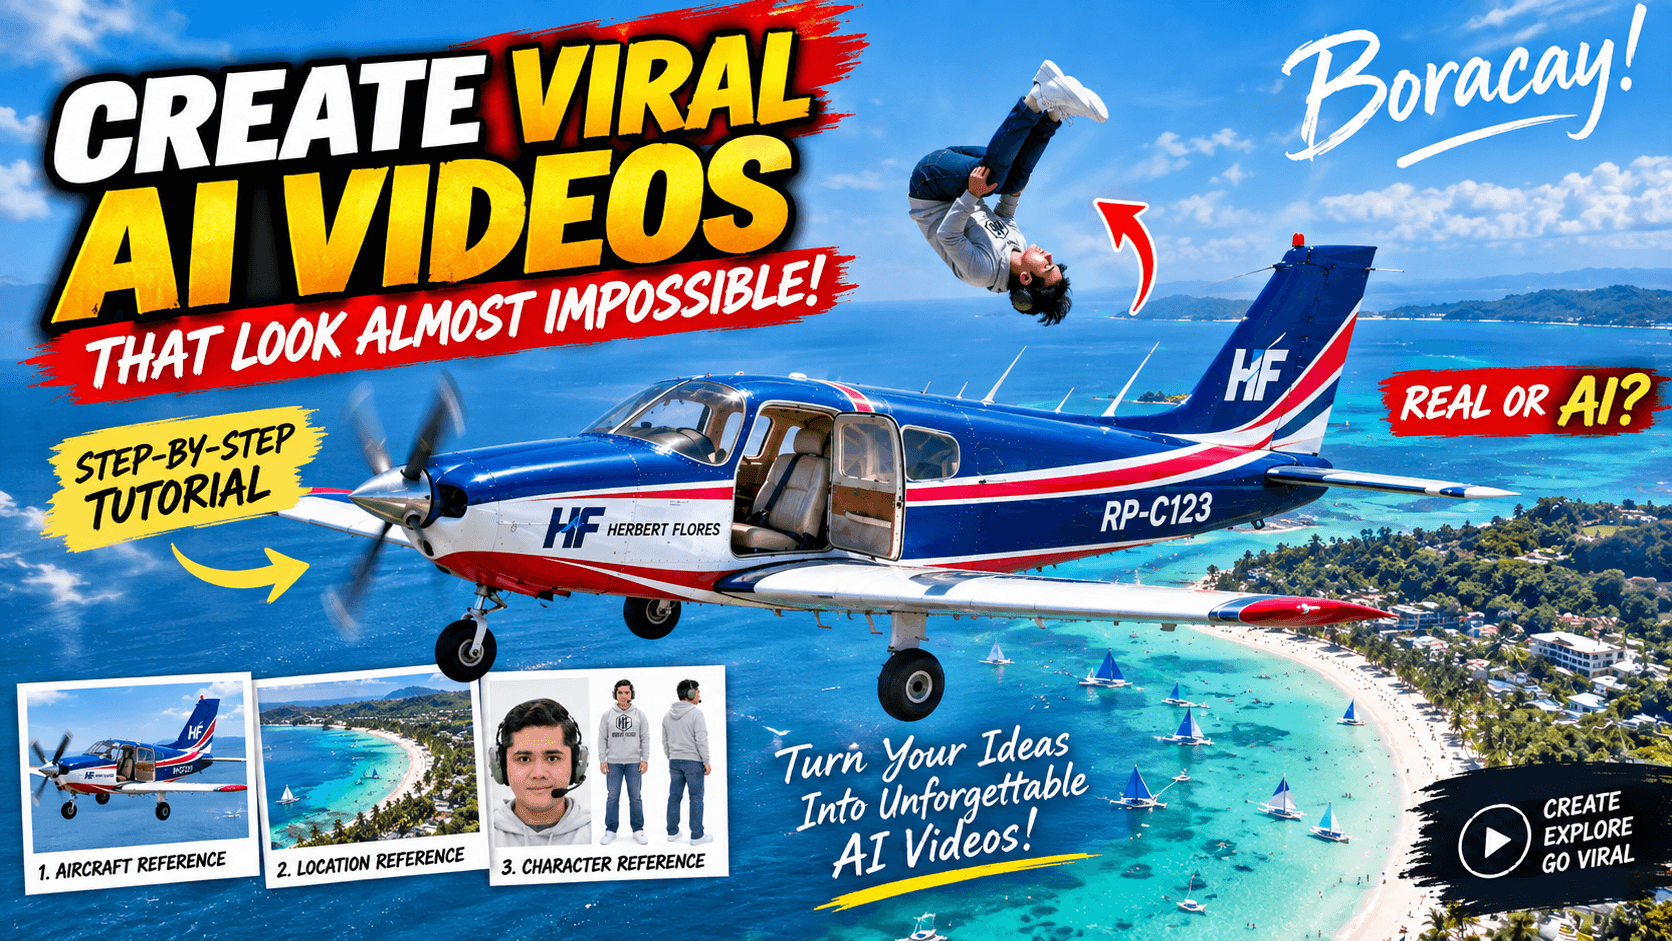
Imagine seeing a video of someone flying over a tropical island…
The airplane door suddenly opens.
He climbs out.
Walks onto the wing.
And then performs a BACKFLIP in mid-air before climbing safely back inside the plane. 😱✈️🤸♂️
At first glance, you might think:
“There’s no way someone actually did that!”
And you’d be right.
Because I created the entire scene with AI.
No airplane rental.
No film crew.
No stuntman.
And definitely no risking my life thousands of feet in the air. 😂
Here’s the actual AI video I created:
🎬 Watch the Final AI Video
Pretty crazy, right? 😂
But what’s even more interesting is that you can create your own version without being an animator, filmmaker or VFX artist.
I’m going to show you exactly how I created it, including the reference images, AI image prompts, video settings and prompting technique I used.
And you don’t have to create an airplane stunt either.
Once you understand the workflow, you can adapt it to your own AI content ideas.
Table of Contents
Why This Type of AI Video Is So Interesting for Content Creators
The biggest battle on social media happens within the first few seconds.
You need to make somebody stop scrolling.
That’s why I like experimenting with concepts that immediately make people wonder:
“Wait… is that real?”
AI video gives creators the ability to visualize situations that would normally be too expensive, complicated or impossible to film.
You could use the same basic workflow for:
- entertaining social-media content
- cinematic storytelling
- attention-grabbing reels and shorts
- building engagement and followers
- creative product demonstrations
- affiliate promotions
- branded content
- fictional travel adventures
But before generating the actual video, we need to prepare the ingredients.
And this is where I start with ChatGPT Images.
STEP 1: Plan Your Impossible Video Idea
Don’t open an AI video generator yet.
First decide:
What is the ONE thing that will make somebody stop scrolling?
For my video, the concept was:
“What if I performed a backflip on the wing of my own airplane while flying over Boracay?”
That’s already enough to build the rest of the project.
Your concept could instead be:
Riding a futuristic motorcycle through Tokyo.
Walking with dinosaurs.
Flying above New York.
Standing beside your own giant product.
Entering a futuristic version of Manila.
Transforming into an action-movie character.
You don’t need to know exactly how to create it yet.
Start with the visual hook.
STEP 2: Create Your Main Object Reference in ChatGPT
Now we’re going to create the visual ingredients.
For my video, the first important element was obviously the airplane.
Instead of letting the video AI invent a random airplane, I created my own reference first using ChatGPT Images.
I wanted something recognizable and branded specifically for me.
Here’s My Aircraft Reference
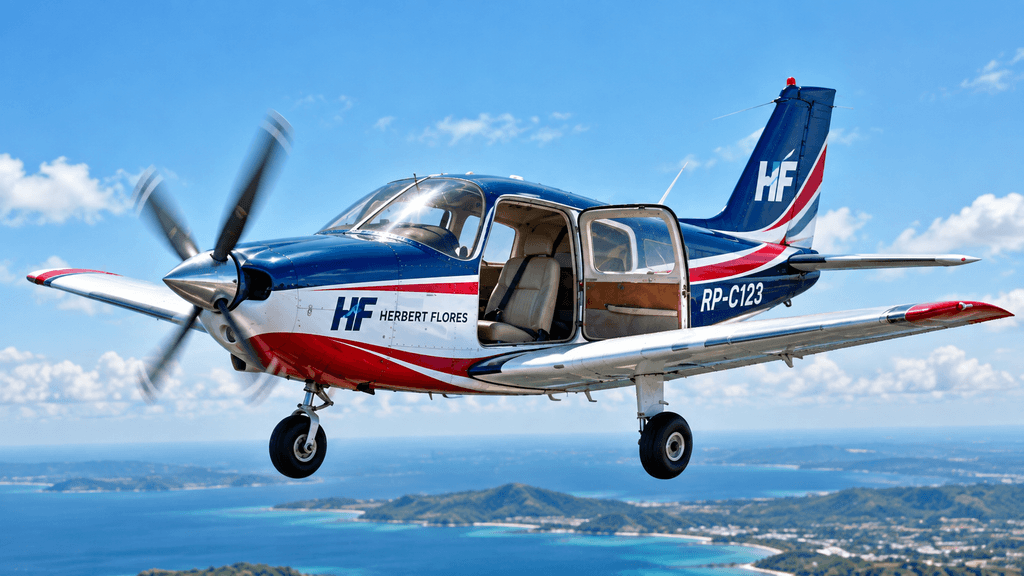
My reference used a blue, white and red design with HF / Herbert Flores branding.
Create Your Own Reference
Open ChatGPT and use this universal prompt:
Create an ultra-realistic 16:9 reference image of a [MAIN OBJECT].

DESIGN:
[Describe the object, colors, materials, branding, shape and important identifying details.]

POSITION:
Show the complete object clearly inside the frame from a useful three-quarter or side angle.

ENVIRONMENT:
Place it in [DESCRIBE SIMPLE ENVIRONMENT].

Keep the main object unobstructed and easy to recognize.

Photorealistic, realistic proportions, natural lighting, sharp details, professional photography.

No unwanted text, no watermark, no extra objects covering the main subject.
Customize the brackets.
For example:
[MAIN OBJECT] could be an airplane, car, motorcycle, robot, product, spaceship or anything important to your story.
If you already have a real product or object, upload its photo to ChatGPT and add:
Use my uploaded image as the strict visual reference. Preserve its design, colors, proportions and identifying details.The purpose isn’t necessarily to create your final artwork.
We’re creating a visual reference that the video model can follow later.
STEP 3: Create Your Location Reference in ChatGPT
Next, decide where your scene takes place.
I wanted mine above Boracay, Philippines.
So I created this aerial location reference:
My Boracay Reference

You can create yours in ChatGPT using this universal prompt:
Create an ultra-realistic cinematic 16:9 establishing image of [LOCATION].

Show the most recognizable visual characteristics of the location, including [LANDSCAPE / LANDMARKS / ARCHITECTURE / ENVIRONMENT].

CAMERA:
Wide aerial establishing view with enough surrounding environment visible for use as an AI video reference.

LIGHTING:
[DAYTIME / SUNSET / NIGHT / OVERCAST].

Photorealistic textures, realistic atmosphere, natural depth, accurate environmental details and high detail.

No people dominating the foreground, no text, no watermark.
For my Boracay scene, my customized version was approximately:
Create an ultra-realistic cinematic 16:9 aerial establishing image of Boracay, Philippines.

Show brilliant turquoise-to-deep-blue tropical water, a long powder-white beach, palm trees, beachfront resorts, lush green terrain, boats and traditional paraw sailboats.

Wide aerial perspective showing both the coastline and surrounding ocean.

Bright tropical midday sunlight, blue sky, realistic coastal haze, photorealistic textures and natural depth.

No text, no watermark.
You could replace Boracay with Palawan, Tokyo, New York, Dubai, Paris, Mars or even a completely fictional world.
STEP 4: Create Your Character Reference in ChatGPT
Now we need our character.
Since I wanted myself inside the video, I uploaded a clear photo of myself to ChatGPT.
Then I asked it to create a multi-angle character reference.
Here’s My Character Reference
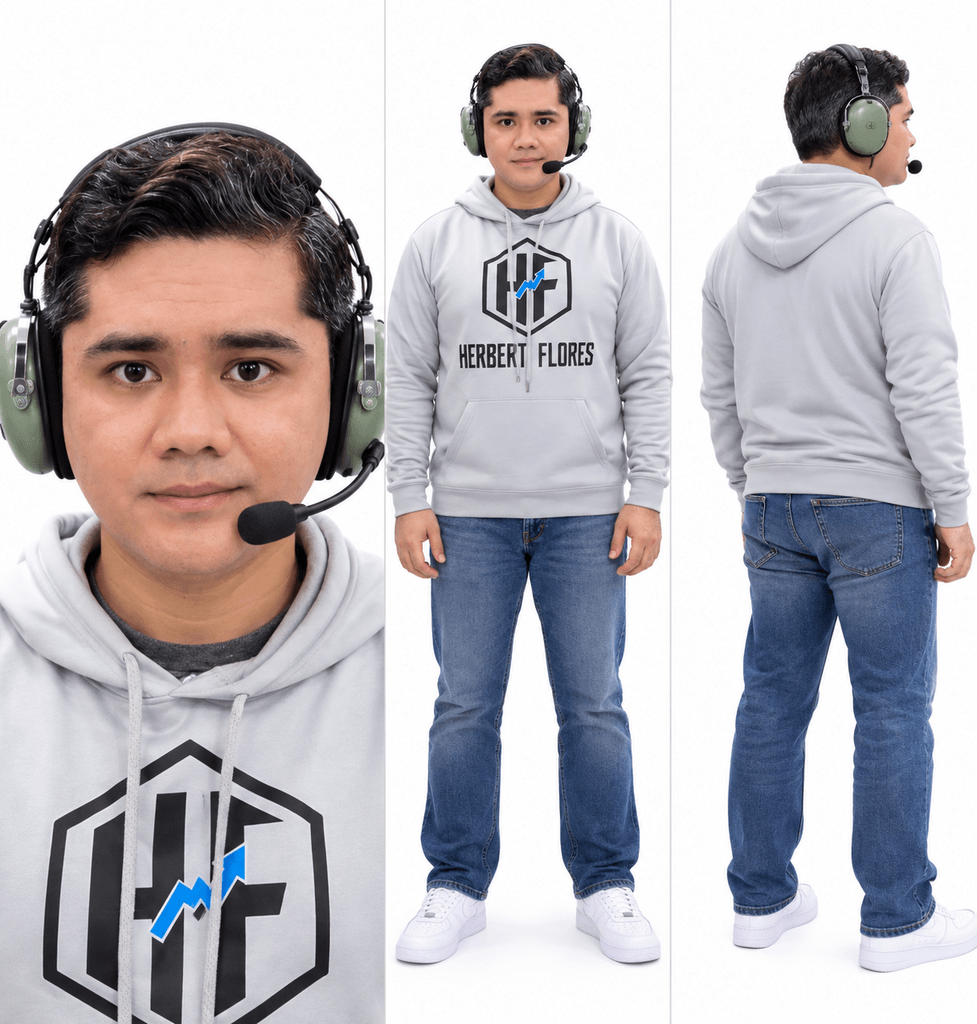
The goal here isn’t to make a flashy social-media photo.
It’s to give the next AI model a clear idea of:
your face + body + clothing + accessories.
Upload Your Photo to ChatGPT
Choose a clear image where your face is visible and well lit.
Then use this prompt:
Use my uploaded photo as the STRICT identity reference.

Create a professional photorealistic character reference sheet of the EXACT SAME PERSON.

IDENTITY — CRITICAL:
Preserve the exact facial identity, hairstyle, skin tone, age, facial proportions and natural appearance of the uploaded person.

Do not redesign, beautify, reshape, age or reinterpret the face.

Create THREE consistent views:

LEFT PANEL:
Detailed front-facing close-up portrait.

CENTER PANEL:
Full-body front-facing view.

RIGHT PANEL:
Three-quarter rear/side full-body view.

OUTFIT:
Dress the person in [DESCRIBE YOUR OUTFIT].

ACCESSORIES:
[DESCRIBE ACCESSORIES IF NEEDED].

Keep the exact same person, clothing and proportions across all three panels.

Pure white seamless studio background, soft even studio lighting, natural posture, neutral relaxed expression, photorealistic, ultra-detailed.

No additional people, no watermark.
For my airplane experiment, I used a light gray Herbert Flores hoodie, jeans, white sneakers and aviation headset with boom microphone.
Now we have all three ingredients:
✈️ Image 1 — Aircraft
🏝️ Image 2 — Location
👤 Image 3 — Character
This is where we can finally start building the video.
STEP 5: Generate the Video
For this experiment, I used PixVerse and selected the Seedance 2.5 video model.
👉 Create Your PixVerse Account Here
You can sign up for free and currently get 60 free credits to experiment with the platform.
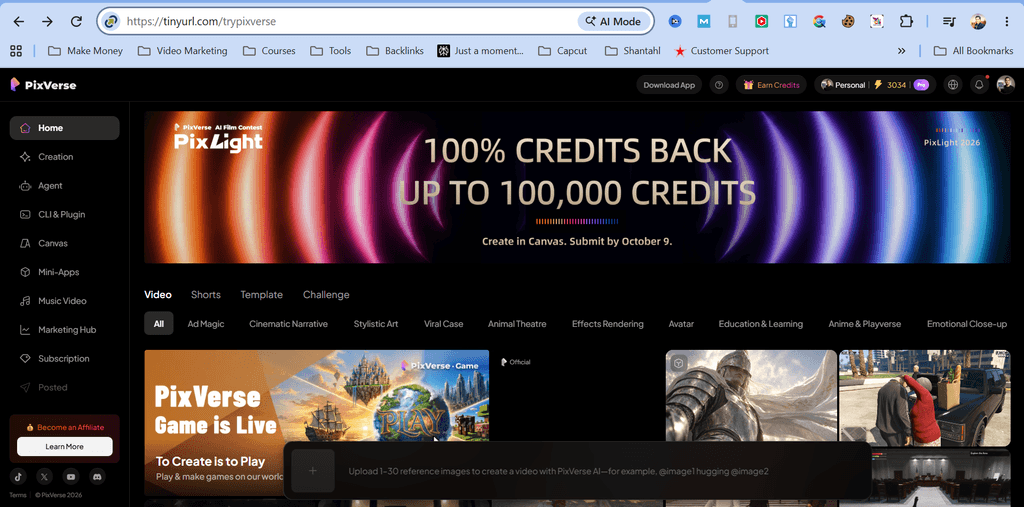
However, there’s an important difference between simply testing the platform and creating a more demanding multi-reference video like my airplane experiment.
For this particular generation/setup, the interface required 1,125 credits.
So the initial 60 free credits are useful for getting familiar with the platform, but they aren’t enough for this exact 15-second backflip generation.
That’s one reason I use a paid/Pro account for serious video creation: you have more credits available to experiment with multiple concepts and generations rather than being limited to a tiny test.
For a content creator, those videos can then become assets for social posts, engagement campaigns, audience building or affiliate promotions.
Of course, AI doesn’t guarantee that a video will go viral—the idea, hook, execution and distribution still matter.
STEP 6: Select Seedance 2.5
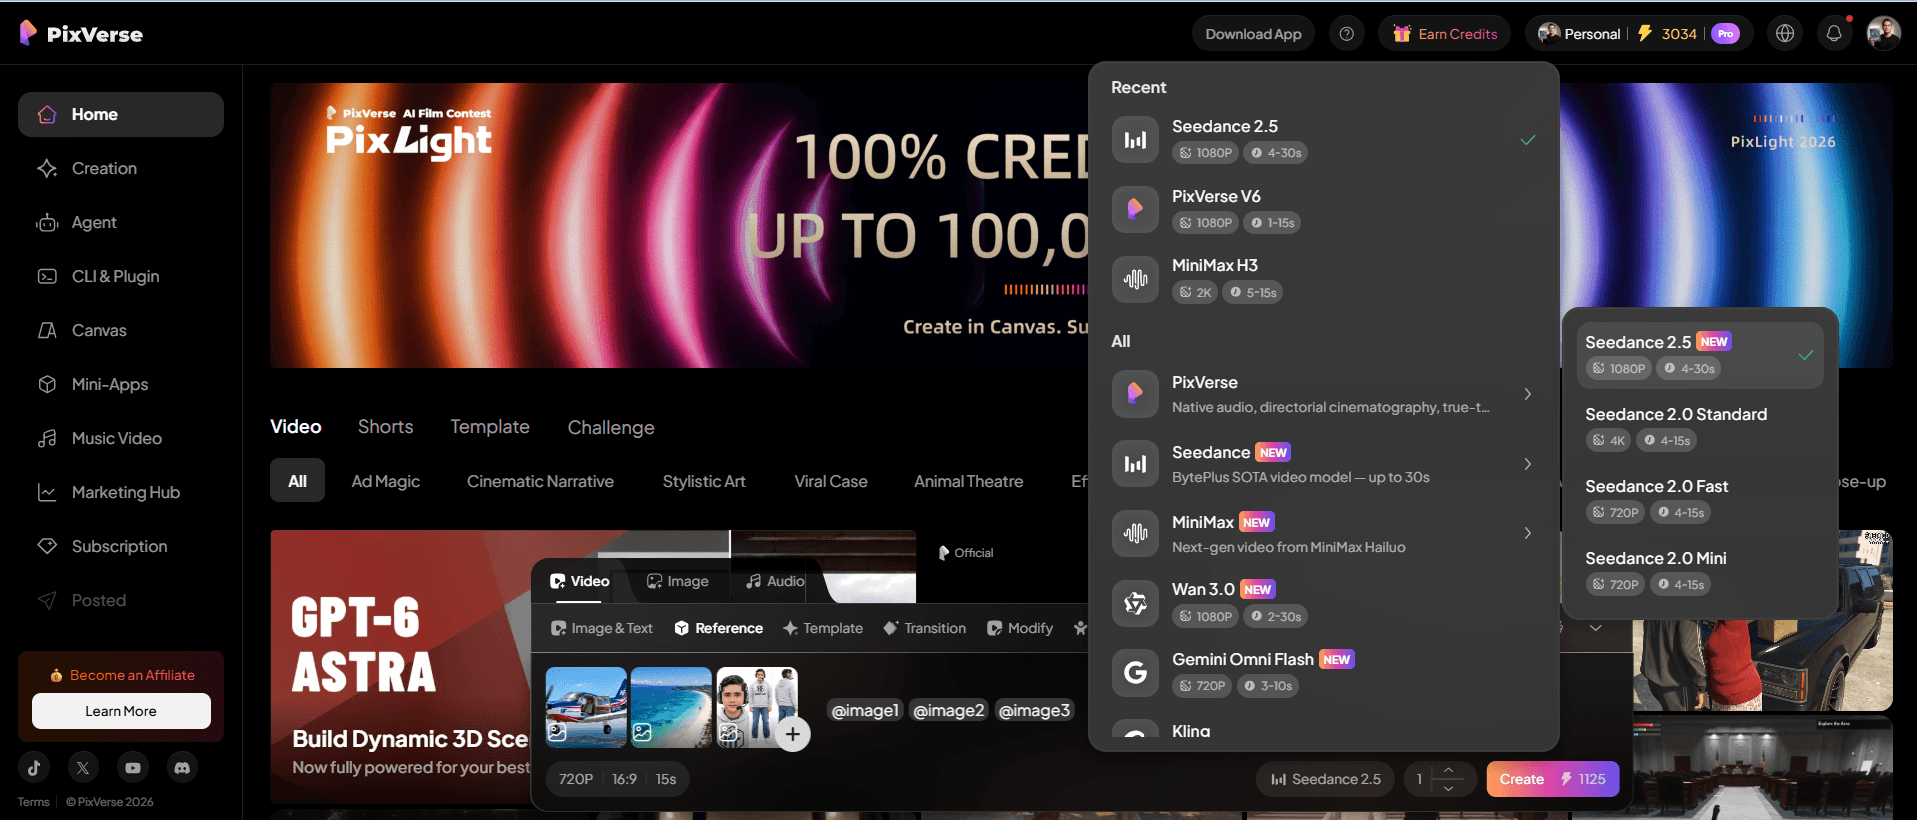
Inside the video generator, select:
Model
Seedance 2.5
Seedance 2.5 can support longer generations, but we don’t need a 30-second scene for this particular idea.
For my backflip video, I used:
Duration: 15 seconds
Resolution: 720P
Aspect Ratio: 16:9
References: 3 images
For normal YouTube/Facebook landscape content, use:
16:9
If you’re specifically creating content for TikTok, Instagram Reels, Facebook Reels or YouTube Shorts, you can instead build your project around:
9:16 vertical
For this experiment, I wanted the full airplane and environment visible, so 16:9 made much more sense.
STEP 7: Upload Your Three Reference Images
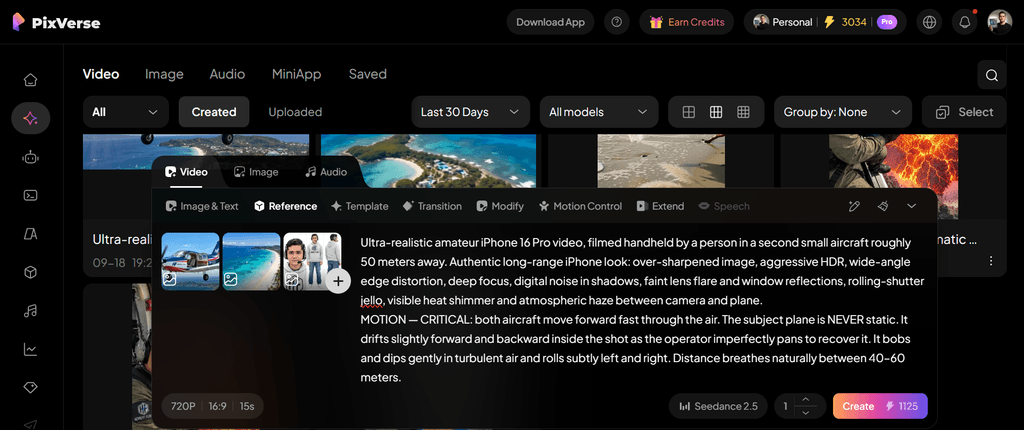
Now upload the images we created earlier.
The setup for my video was:
This is exactly why we created them before opening the video generator.
Instead of asking the model to imagine everything from text, we’re giving it visual guidance.
Don’t Want to Build Everything From Scratch?
There’s also an easier way to experiment.
PixVerse has a Template section.
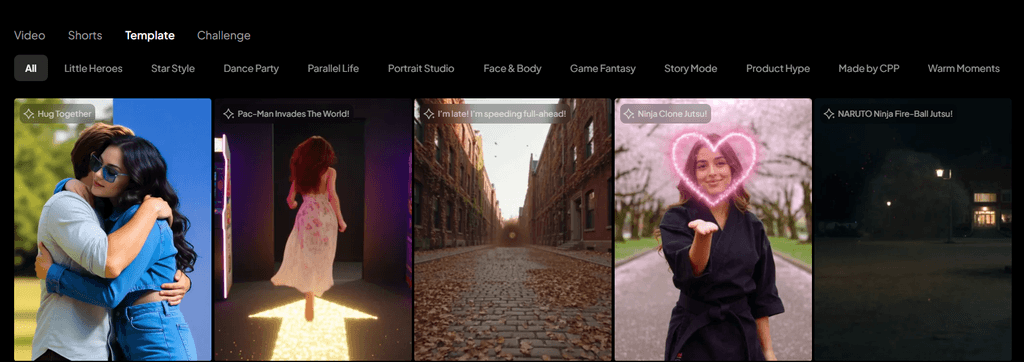
You’ll find ready-made effects and concepts where you can upload an image and experiment without writing a massive cinematic prompt.
If you’re completely new to AI video, I’d actually recommend playing with some templates first.
Then move to the custom reference workflow when you want more control.
STEP 8: Don’t Just Write a Prompt — DIRECT the AI
This was probably my biggest lesson from creating the backflip video.
At first, you might think you can simply write:
“Herbert exits the airplane, walks on the wing and does a backflip.”
A human understands that immediately.
An AI video model might not. 😂
In one of my earlier attempts, my character climbed onto the top of the aircraft.
That’s not what I wanted.
So instead of simply describing the stunt, I started defining the physical space.
I told the AI:
CABIN DOOR
→ SAME WING
→ MIDDLE OF SAME WING
→ BACKFLIP ABOVE SAME WING
→ LAND ON SAME WING
→ WALK BACK
→ CABIN
That was a huge improvement.
STEP 9: Use This Universal AI Video Prompt
Here’s a reusable framework you can customize for your own idea.
Ultra-realistic amateur smartphone video filmed from [CAMERA POSITION].

STYLE:
Authentic smartphone footage, natural lighting, realistic motion blur, subtle handheld movement, realistic environmental atmosphere, photorealistic textures.

MOTION:
Describe how the main subject and environment move throughout the scene. The movement should remain physically and visually consistent.

CAMERA — CRITICAL:
One continuous unbroken take.
Keep [MAIN SUBJECT] visible throughout.
No unwanted cuts, sudden camera-angle changes, unnecessary zooming or cropping.

REFERENCE 1:
Use @[Image 1] as the exact reference for [OBJECT / PRODUCT / VEHICLE].
Preserve its colors, proportions, design and identifying visual details.

REFERENCE 2:
Use @[Image 2] as the environment reference for [LOCATION].
Preserve the recognizable landscape, atmosphere and environmental characteristics.

REFERENCE 3:
Use @[Image 3] as the strict character reference.
Preserve the same face, hairstyle, skin tone, age, body proportions and clothing throughout.
No identity drift, face morphing or character replacement.

ACTION TIMELINE:

0–3 seconds —
[FIRST ACTION]

3–6 seconds —
[SECOND ACTION]

6–9 seconds —
[MAIN ACTION]

9–12 seconds —
[REACTION / NEXT ACTION]

12–15 seconds —
[ENDING]

SPATIAL RULE:
Describe exactly where the character starts, where they move, what object they interact with and where they finish.

CONSISTENCY — CRITICAL:
Same character throughout.
Same environment throughout.
Same referenced objects throughout.
No extra people, duplicate limbs, morphing objects or unexpected costume changes.

Natural physics, realistic movement, photorealistic, 720P, 16:9, 24fps, 15-second continuous footage.
Don’t simply copy the words.
Customize everything inside the brackets for your own concept.
STEP 10: Here’s How I Customized It for My Backflip
My camera instruction was especially important.
I wanted the viewer to see the entire airplane instead of having the AI suddenly zoom into my face.
So part of my prompt said:
CAMERA — CRITICAL:

ONE CONTINUOUS UNBROKEN TAKE, no cuts, no angle changes.

Fixed wide side-profile view from approximately 50 meters.

THE ENTIRE AIRCRAFT MUST REMAIN VISIBLE FROM NOSE/PROPELLER TO TAIL AND FULL WINGS THROUGHOUT ALL 15 SECONDS.

NO ZOOM, NO CLOSE-UP, NO CROPPING THE AIRCRAFT, NO ORBIT, NO SWITCHING SIDES, NO APPROACHING THE PLANE.

Natural handheld shake and small corrective pans only.
Then I described the action by time.
0.0–3.0s:
Complete aircraft visible flying above Boracay. Cabin door opens.

3.0–6.0s:
Character climbs directly from the cabin onto the visible wing and walks toward the middle.

6.0–9.0s:
Character performs one cinematic backward flip directly above the SAME wing.

9.0–11.0s:
Character lands with both feet back on the SAME wing and regains balance.

11.0–13.5s:
Character walks back along the SAME wing and enters the cabin.

13.5–15.0s:
Character waves through the window while the aircraft continues flying over Boracay.
And then I reinforced the most important rule:
CRITICAL SPATIAL RULE:

CABIN DOOR → SAME WING → MIDDLE OF SAME WING → ONE BACKFLIP ABOVE SAME WING → LAND ON SAME WING → WALK BACK → CABIN.

The character NEVER climbs onto the roof, cockpit top, fuselage top, tail or opposite wing.
It sounds repetitive.
But with complex AI video, repetition can be useful when you’re reinforcing something the model keeps getting wrong.
STEP 11: Generate and Review the Result
Now hit Generate.
Don’t automatically assume your first result will be perfect.
Look at it like a director.
Ask yourself:
Did the camera follow my instructions?
Did my character stay consistent?
Did the reference object change?
Did the action happen in the correct place?
Did the AI misunderstand anything?
For example, if your character goes onto the wrong part of an object, strengthen the spatial rule.
If the camera zooms when you don’t want it to, reinforce:
NO ZOOM.
If your character changes appearance, strengthen the identity/reference instructions.
The goal isn’t to rewrite the entire prompt after every generation.
Fix the specific thing the AI misunderstood.
What I Learned From Creating This Video
My final result wasn’t simply:
prompt → click → perfect video.
There was experimentation involved.
But once I became more precise about:
camera position, visual references, character identity, action timing and spatial movement, the result improved dramatically.
That’s when I stopped thinking of AI prompting as simply:
“Tell the AI what video you want.”
And started thinking of it as:
“Direct the AI like you’re directing a scene.”
That’s a much more useful mindset.
Is a Paid PixVerse Account Worth It?
If you only want to see what AI video generation is like, start with the free credits.
At the time I created this tutorial, a new signup offered 60 free credits.
But remember: my exact 15-second Seedance 2.5 backflip setup required 1,125 credits, so you’ll need substantially more credits if you want to reproduce this kind of generation.
For someone creating AI content regularly, that’s where a Pro/paid account becomes more useful.
Instead of creating one experiment, you can build a library of content for:
social media → audience engagement → follower growth → branded content → affiliate promotions.
Whether that investment makes sense depends on how often you’re going to create videos and how you plan to use them.
Your Turn: Create Something People Don’t Expect
You don’t need to copy my airplane.
Actually, I’d rather you didn’t.
Take the workflow and create your own impossible idea.
Start with:
1. THE HOOK
What would make somebody stop scrolling?
2. THE OBJECT
Generate your main object/reference in ChatGPT.
3. THE LOCATION
Generate your environment reference.
4. THE CHARACTER
Upload your photo and create a consistent character sheet.
5. THE VIDEO
Bring those references into PixVerse, select Seedance 2.5 and direct your scene.
Then experiment.
Your first result might be weird.
Your second might be better.
And sometimes you’ll get something that makes you look at the screen and say:
“WAIT… AI actually did that?!” 🤯
That’s the fun part.
👉 Start Creating Your AI Videos Here
And one final reminder:
Keep the impossible stunts inside the AI. 😂✈️🤖
Affiliate Disclosure
This article contains affiliate links. If you sign up or purchase through one of my links, I may earn a commission at no additional cost to you. I only recommend tools that I believe may be useful for the workflows discussed in my content.


